Aerial view
The same plan, shown as plants
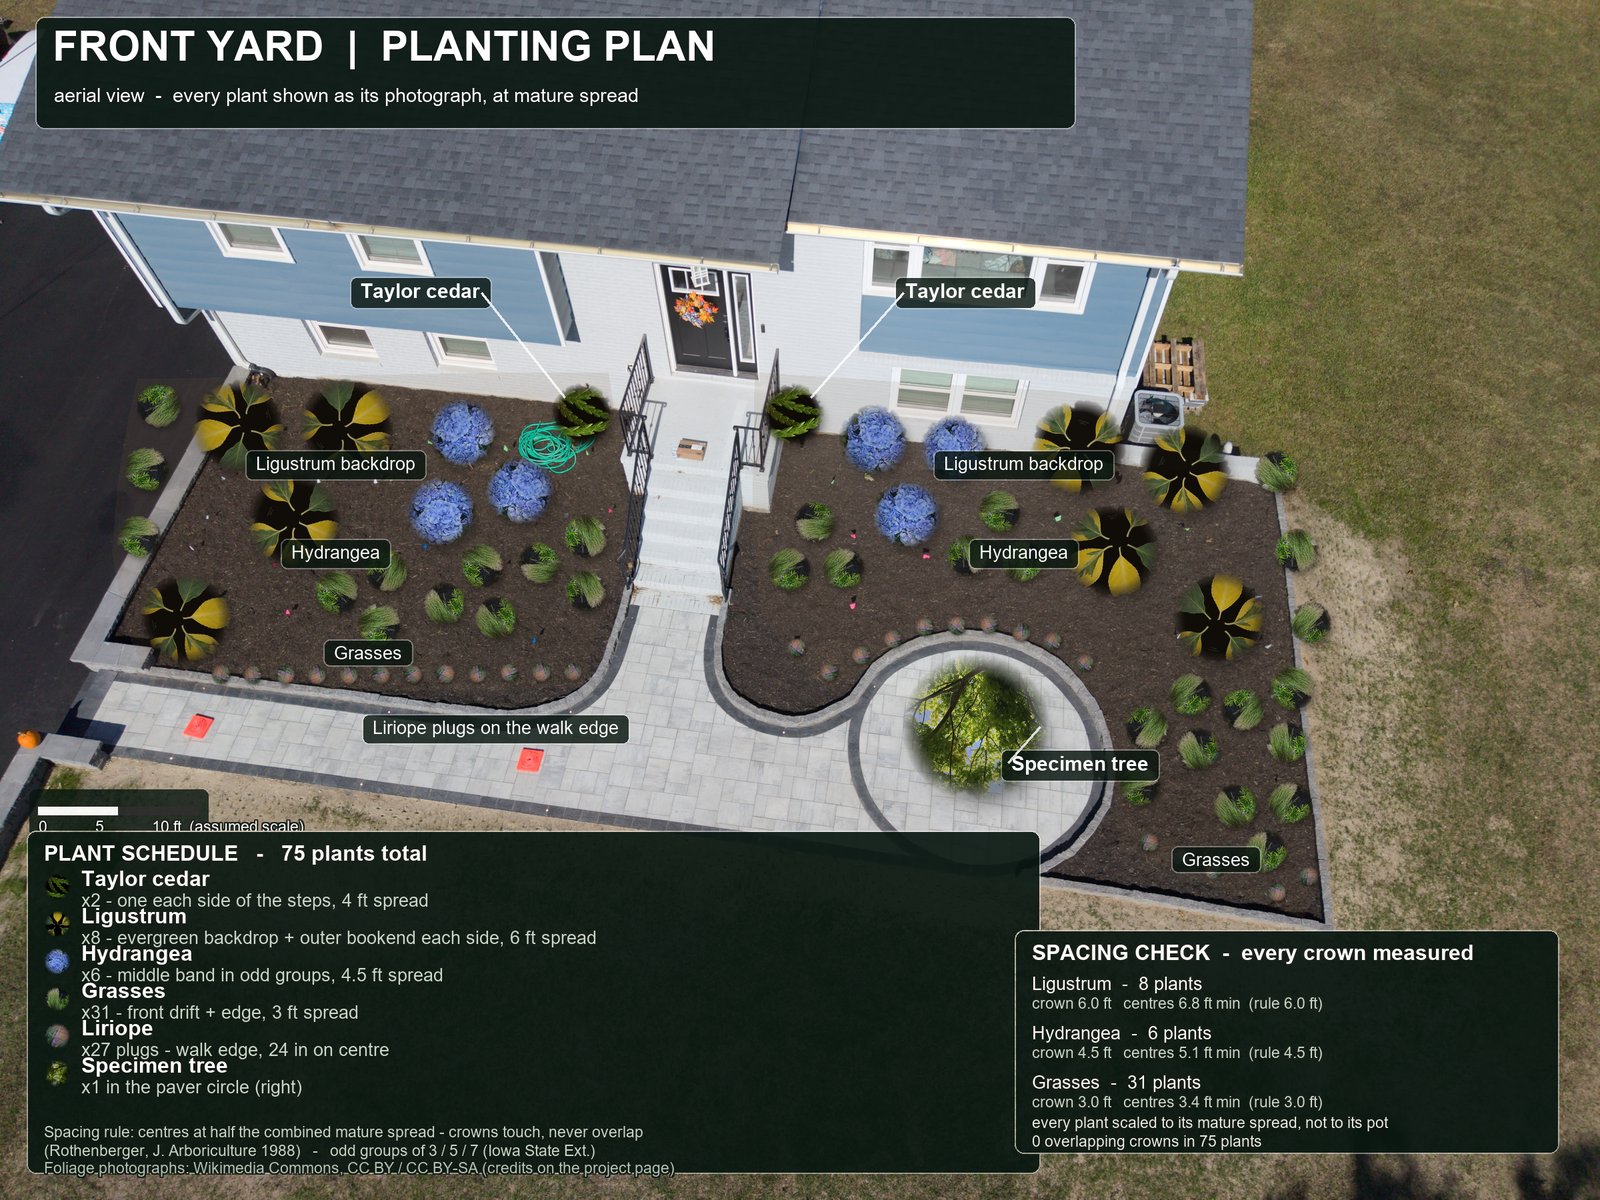
This is the plan drawn the way it will actually look from above: each plant is a photograph of its foliage, cut to an irregular crown and scaled to the width it will really reach. It is the planting at maturity — not a picture of how small it looks on planting day.
The plan
Two beds, one planting idea
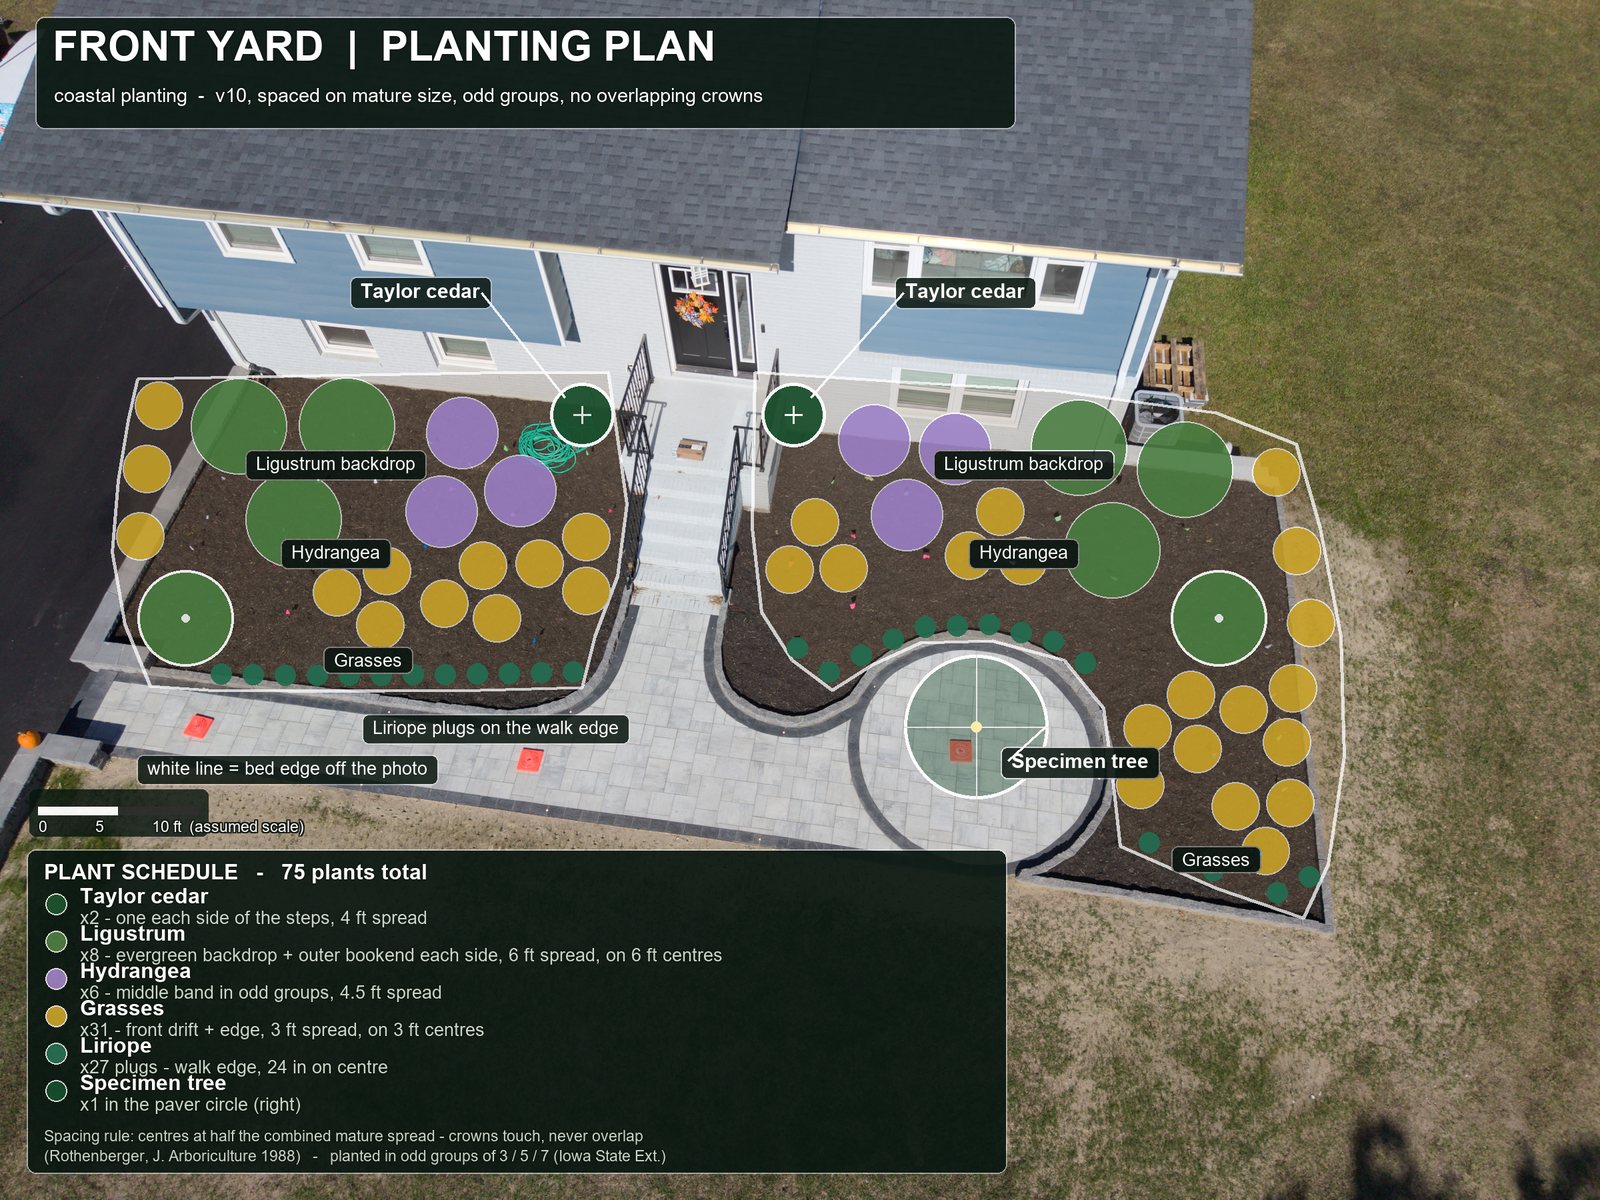
The house sits at the top of the photograph, the drive runs down the left. Both beds carry the same species in the same order — tall evergreen at the back, flowering shrubs in the middle, grasses at the front — so the two sides read as one garden rather than two.
What changed
Fewer plants, better placed
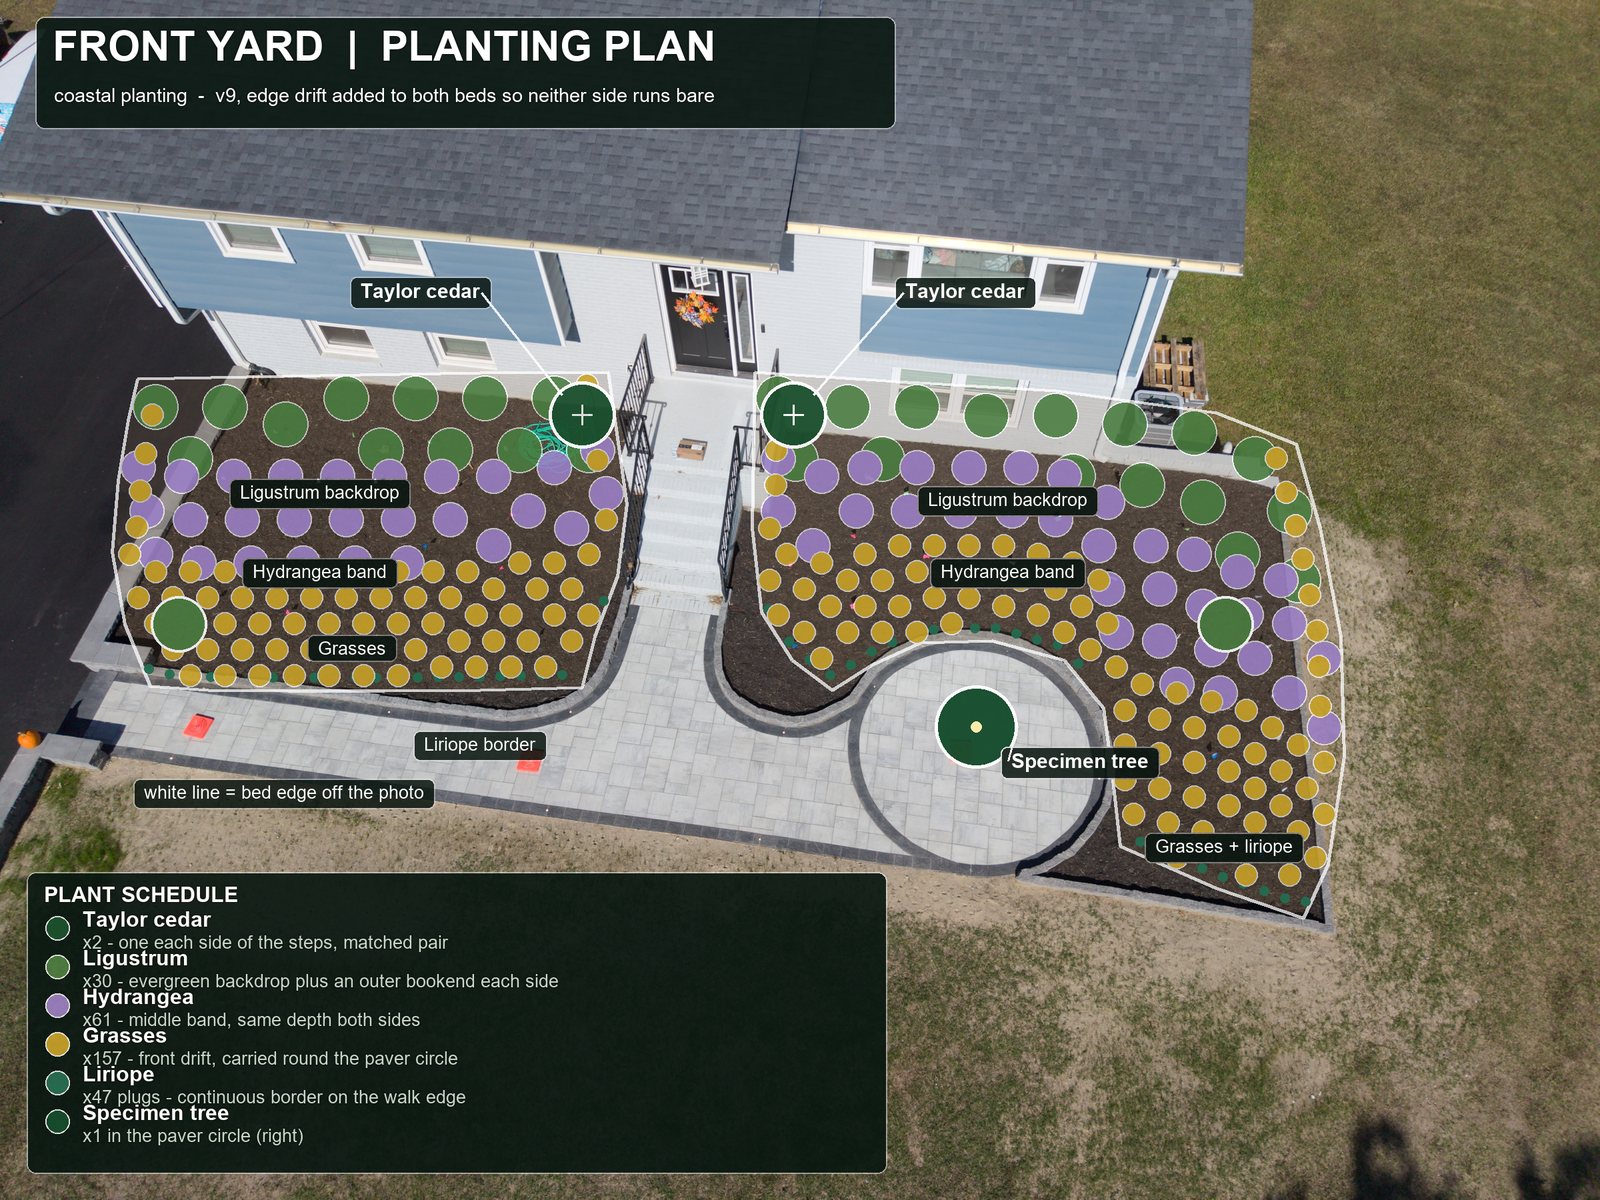
The first pass packed the beds to make them look full on paper. That is the wrong test: it looks finished on day one and crowded by year three. The plan was rebuilt around how wide each plant actually grows.
The rules behind it
Four rules, borrowed from working landscapers
None of this is invented for your yard. Each choice comes from published planting-design practice.
Space by mature size, not by the pot
Two plants go half their combined mature spread apart. Add the two spreads together and halve it — that is the minimum centre-to-centre distance. The crowns meet without growing through one another.
R. Rothenberger, “Spacing of Landscape Plants”, Journal of Arboriculture 14(8):208, 1988.Plant in odd groups
Three, five or seven of a kind reads as a natural drift. Pairs look formal and fours look like a block. The same group is repeated in both beds so the two sides rhyme.
Iowa State University Extension, Planting Design Tips.Right plant, right place
Cedars anchor the corners and hold their shape; hydrangeas take the middle band where they get afternoon relief; grasses take the hot edge along the drive. Each is chosen for the spot it is in.
Standard horticultural practice.Two edges, kept separate
A soft planted line — the tallest material at the back, lowest at the front — and a crisp, straight lawn-and-walk edge the plants never cross. The bed reads as intended instead of as a filled rectangle.
Standard landscape-design practice.How it was checked
Every crown circle, drawn to scale
To prove the spacing rule is holding and not just claimed, the mature crown of every shrub is drawn on the plan as a dashed circle at true scale. Two crowns that would collide show as overlapping rings — there are none.
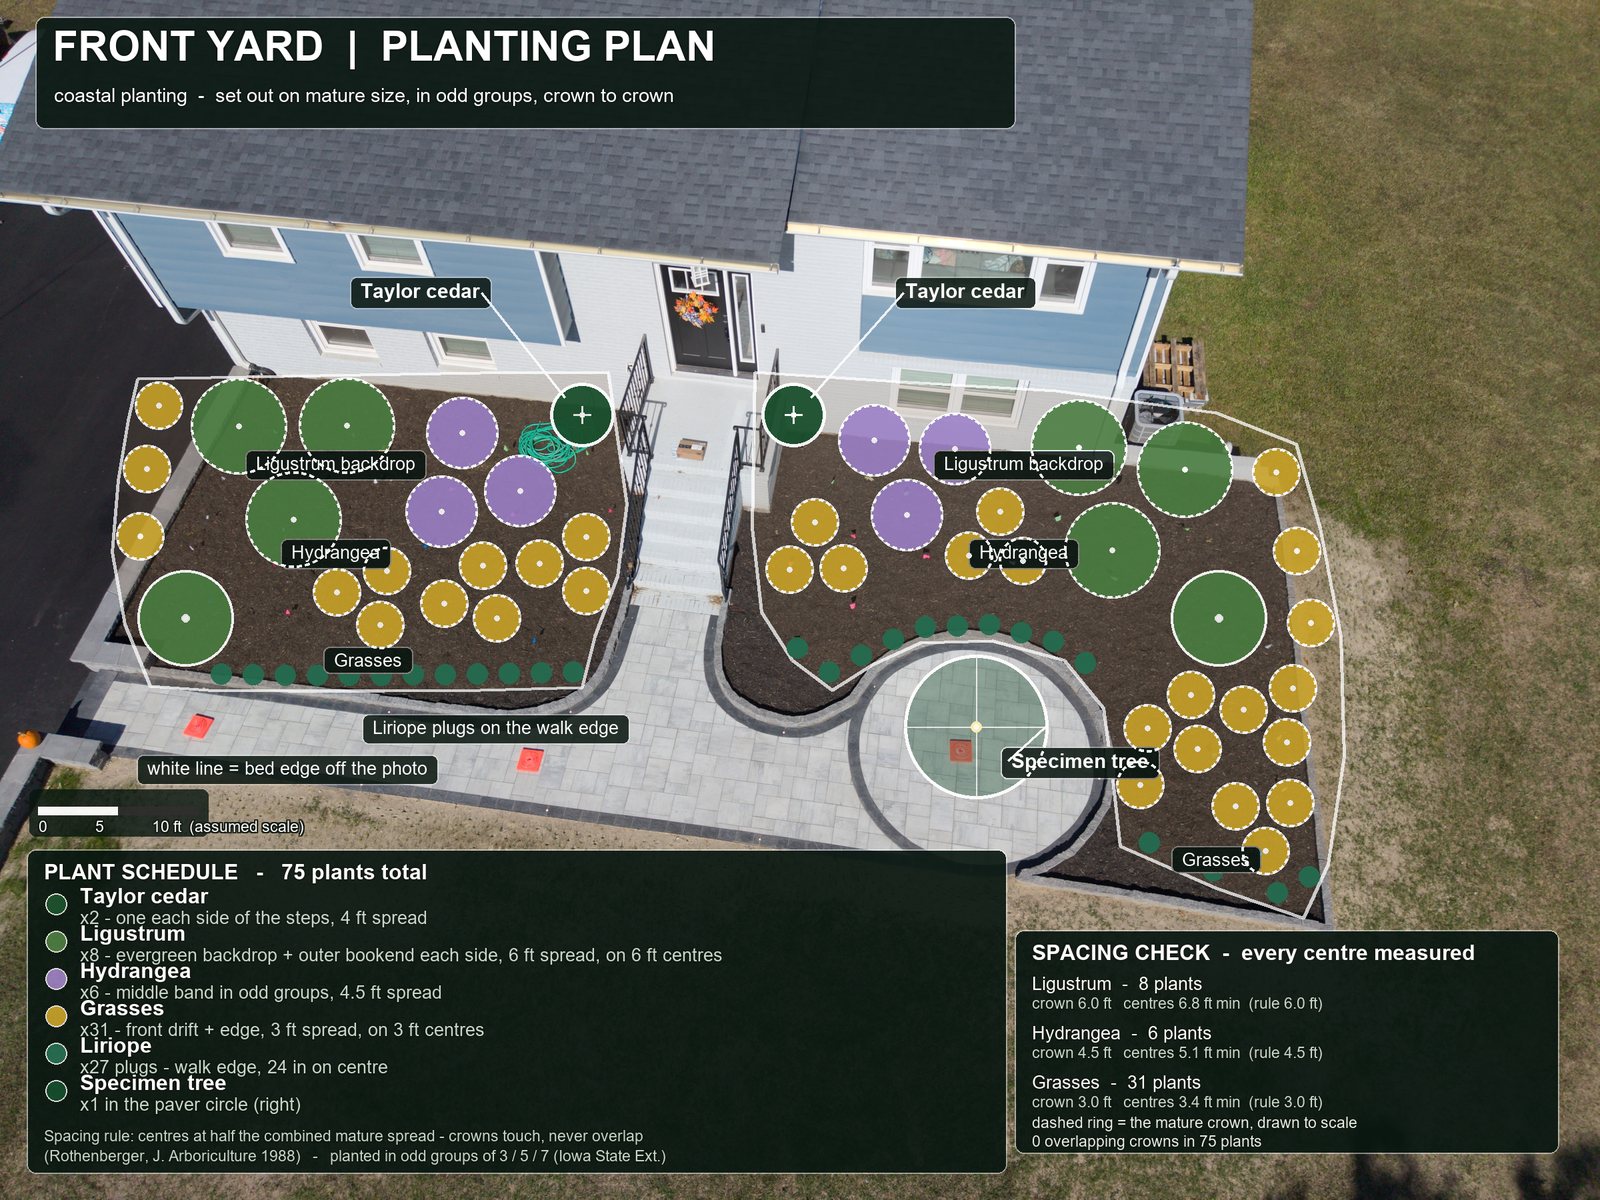
- Ligustrum — 6 ft crowns, closest centres measured at 6.8 ft (rule: 6.0 ft).
- Hydrangea — 4.5 ft crowns, closest centres 5.1 ft (rule: 4.5 ft).
- Grasses — 3 ft crowns, closest centres 3.4 ft (rule: 3.0 ft).
- No overlapping crowns anywhere in the plan — checked on all 75 plants, symbol against symbol, not by eye.
- Every symbol was also tested against the driveway, the front walk and the paver circle, so nothing is planted on the paving.
The process
How the plan was put together
-
Traced the beds off your photograph
The mulch edge of each bed was drawn from the aerial image itself — the drive on the left, the front walk and the steps in the middle, the paver circle on the right — so the plan matches the ground.
-
Set the scale
The drawing is scaled from the photograph at 1 in = 2 ft, with the scale bar printed on the plan so it can be checked with a ruler on site.
-
Let the spacing rule set the count
Rather than choosing a number of plants and fitting them in, each species was placed at half its combined mature spread and the total fell out of that: 75 plants, not a target.
-
Set out the groups, layer by layer
Back of the bed first, then the middle band, then the front drift and the low plug row along the walk — each in odd groups, mirrored across the front steps so the two beds match.
-
Measured it, then looked at it
Every centre-to-centre distance and every symbol against the paving was measured; then the drawing was reviewed at full size by eye and corrected where the eye found something the numbers did not.
-
Wrote the schedule
The plant schedule and the spacing rule are printed on the plan, so whoever does the planting can set it out without needing the notes.
Good to know
Assumptions, stated plainly
- The scale is derived from your photograph, not from a site survey. If a tape measure on site disagrees, the survey wins — the layout is easy to shift.
- Bed edges follow the mulch line visible in the photograph; a slight tidy of the edge on site may change them by a few inches.
- Plant sizes are the mature spreads grown plants reach in this climate — the beds will look open in the first year and will close by about year three.
- The paver circle and the front walk are measured from the image, not surveyed.
- Quantities are plant counts for setting out, not a purchasing list — a grower may substitute a similar cultivar at the same mature size.